'/%3e%3cdefs%3e%3clinearGradient%20id='paint0_linear_6609_68599'%20x1='3.18225'%20y1='15.6908'%20x2='32.433'%20y2='20.6207'%20gradientUnits='userSpaceOnUse'%3e%3cstop%20stop-color='%230048ED'/%3e%3cstop%20offset='1'%20stop-color='%230DECD7'/%3e%3c/linearGradient%3e%3c/defs%3e%3c/svg%3e)
'/%3e%3cdefs%3e%3clinearGradient%20id='paint0_linear_6609_68609'%20x1='3.18219'%20y1='15.6908'%20x2='32.4329'%20y2='20.6207'%20gradientUnits='userSpaceOnUse'%3e%3cstop%20stop-color='%236896FF'/%3e%3cstop%20offset='1'%20stop-color='%230DECD7'/%3e%3c/linearGradient%3e%3c/defs%3e%3c/svg%3e)


How to Use Essay Writer?
Essay Writer generates a paper through a five-step setup process. Most of the process uses buttons and selectable options, so you do not need to prepare a complex prompt in advance.
Open Essay Writer
You can get started from either of these locations:
- Select Essay Writer on the MuseWork home page;
- Open Use a Skill in the chat input area, then select Essay Writer.
The five-step setup panel will open directly in your current conversation.
Step 1: Add Your Topic and Assignment Instructions
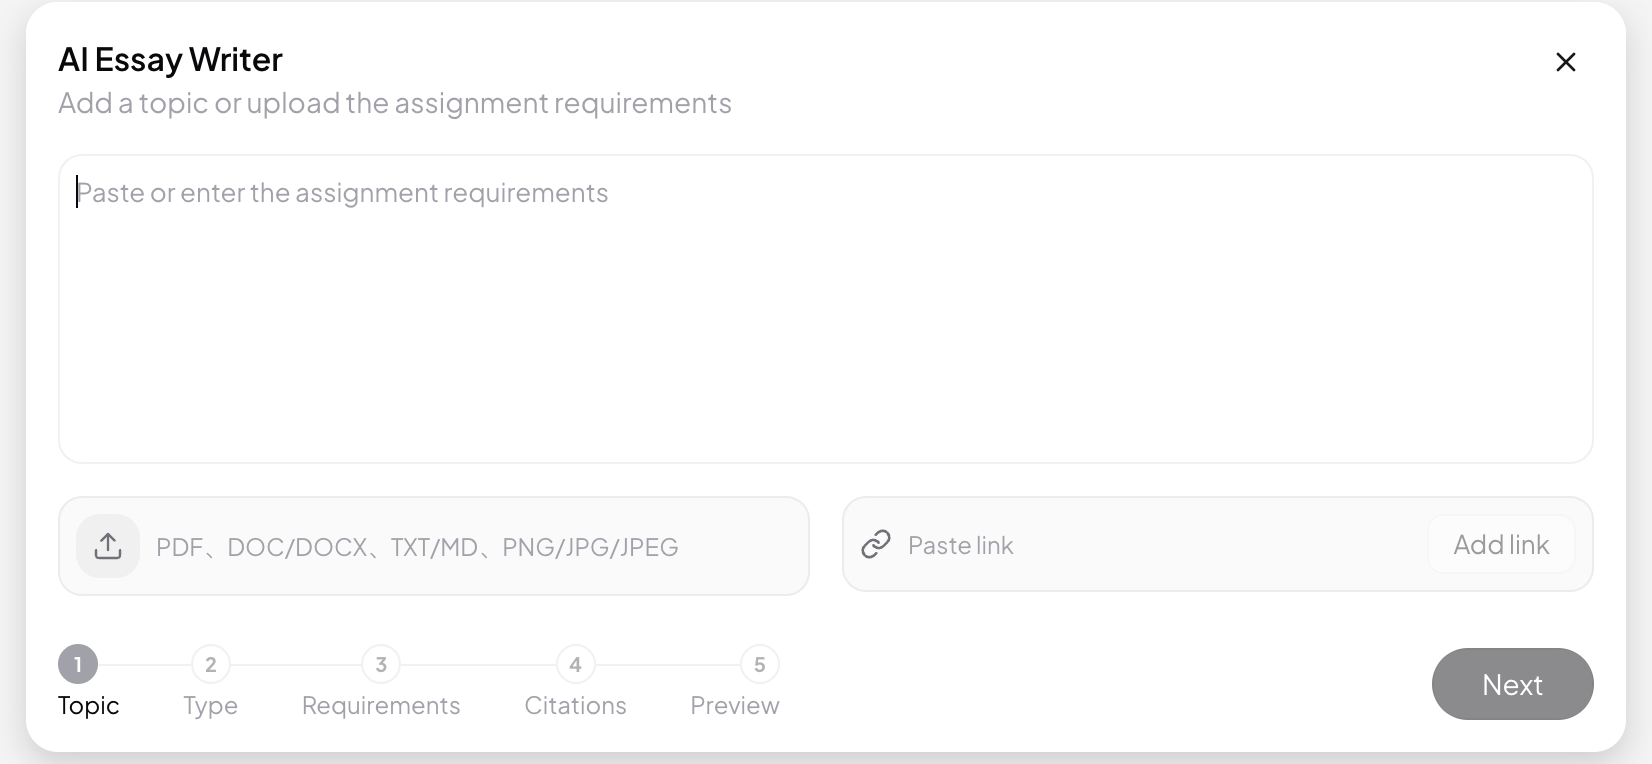
Enter the paper title, research topic, or assignment instructions provided by your instructor.
If the requirements are already contained in a file or on a webpage, you can also select:
- Add File: Upload a PDF, DOCX, TXT file, image, or other supported material;
- Paste Link: Add a link to an assignment page, article, or reference source.
You do not need to provide both a topic and supporting materials. Once you have entered a topic or added at least one usable source, click Continue.
Step 2: Choose a Paper Type
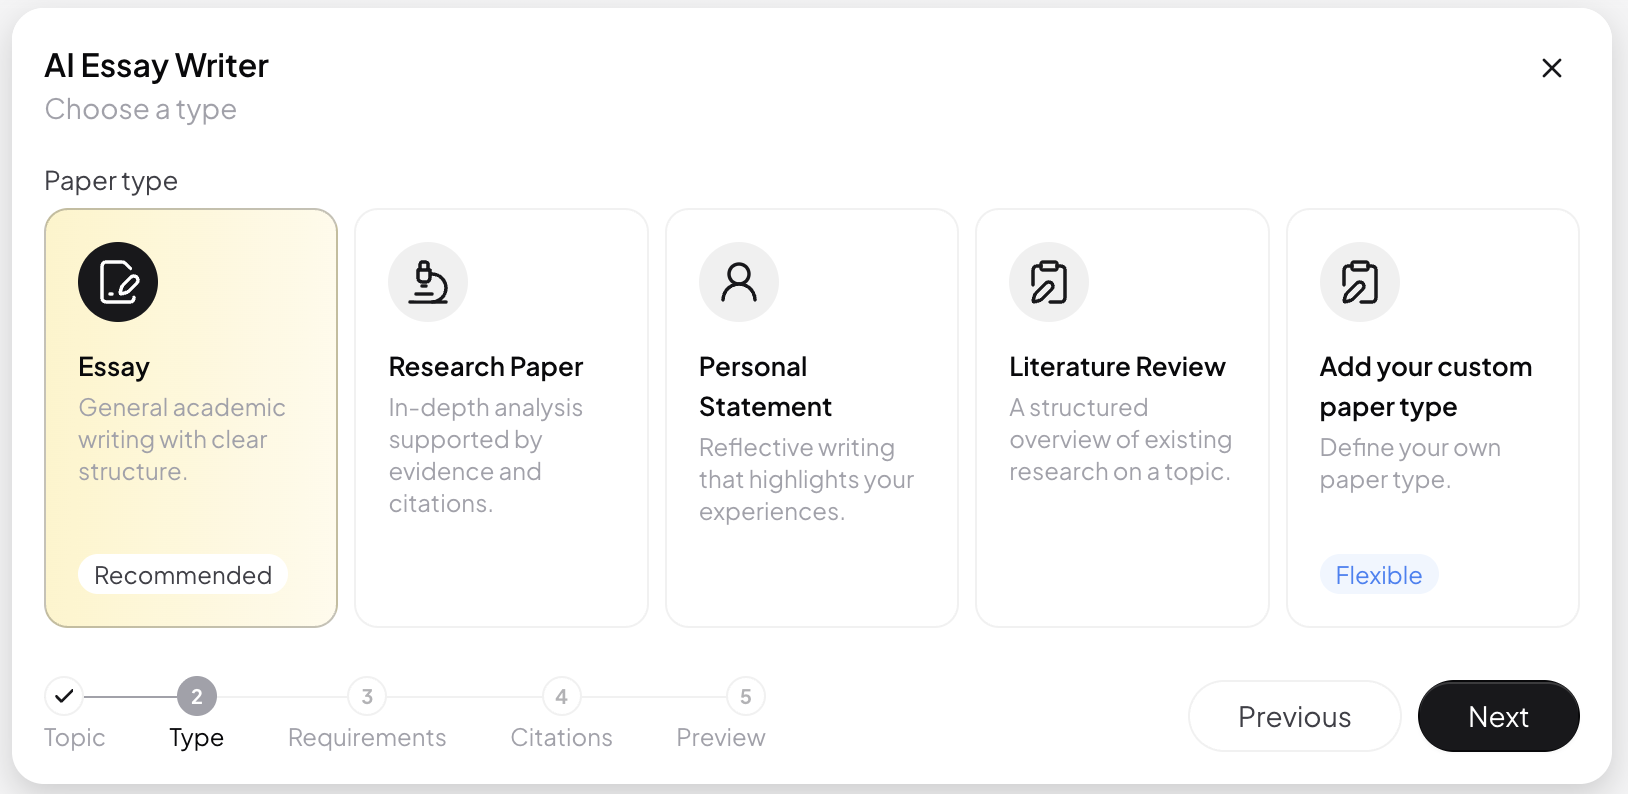
Select the option that best matches your assignment:
- Argumentative Essay: Best for developing and supporting a position;
- Research Paper: Best for conducting an in-depth investigation using sources, data, or case evidence;
- Personal Statement: Best for writing about your experience, motivation, and goals;
- Literature Review: Best for examining existing research, areas of agreement and disagreement, and research gaps;
- Custom Paper Type: Best for case studies, lab reports, and other formats not listed above.
If you select a custom type, enter the specific paper type in the field that appears. Then click Continue.
Step 3: Set the Writing Requirements
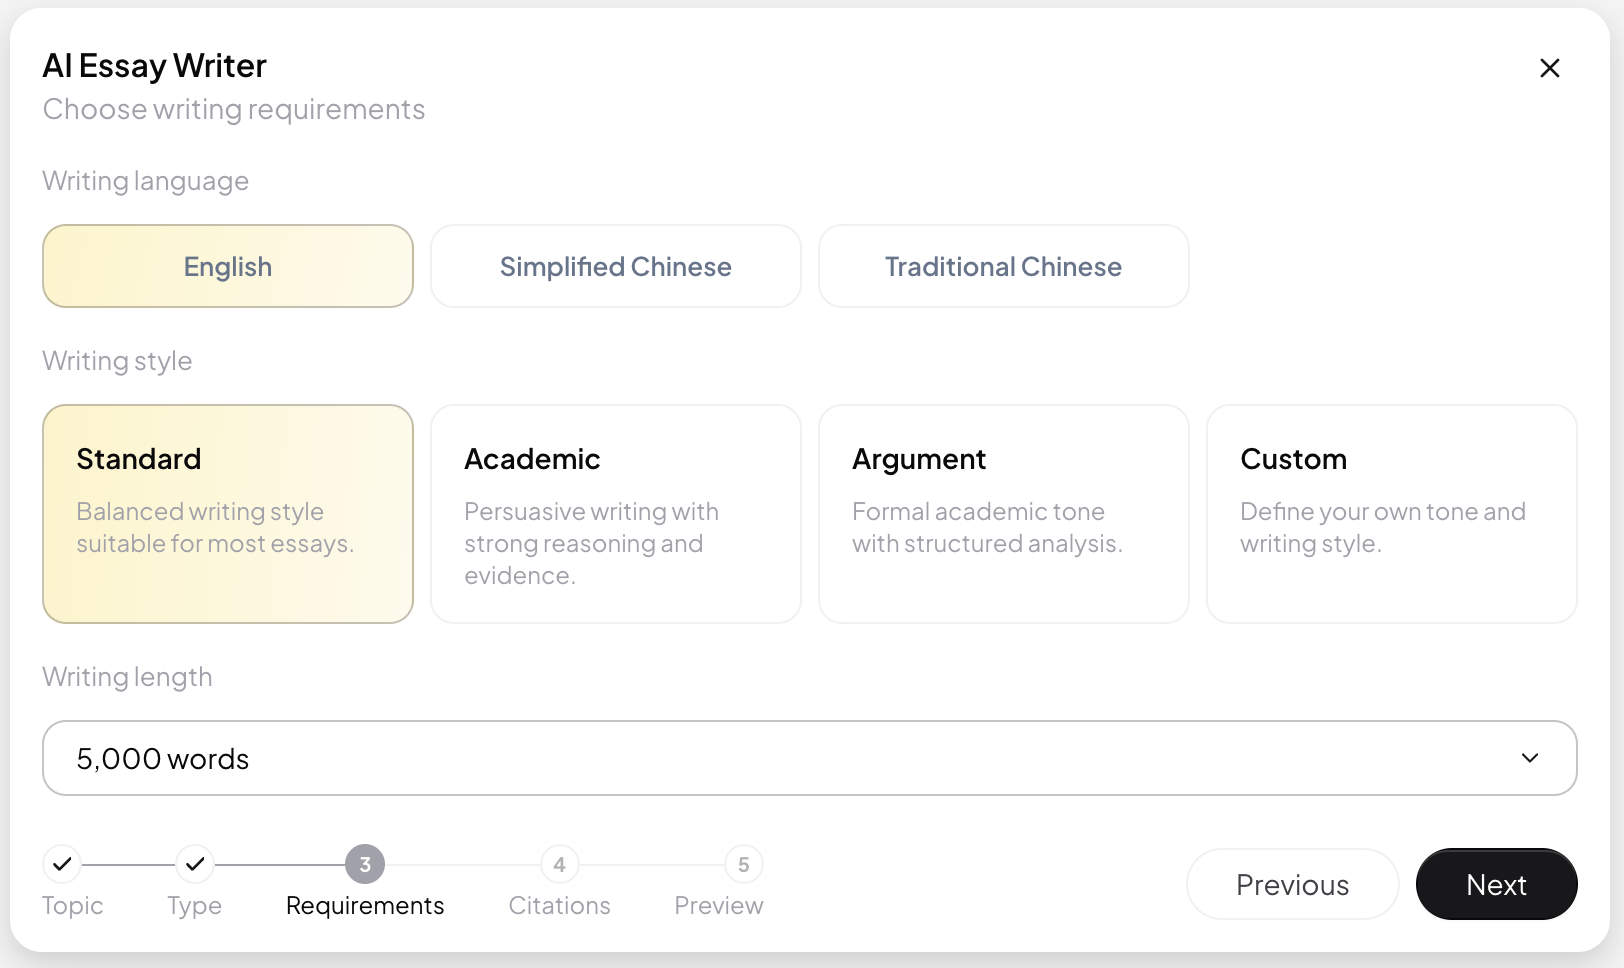
Configure the following three settings:
- Writing Language: Auto-detect, Simplified Chinese, Traditional Chinese, or English;
- Writing Style: Standard, Academic, Argumentative, or Custom;
- Word Count: Select one of the available target lengths.
If you choose a custom writing style, describe the tone or approach you want Essay Writer to follow. When finished, click Continue.
The MuseWork interface language does not determine the language of your paper. The option selected under Writing Language takes precedence.
Step 4: Set Citations and References
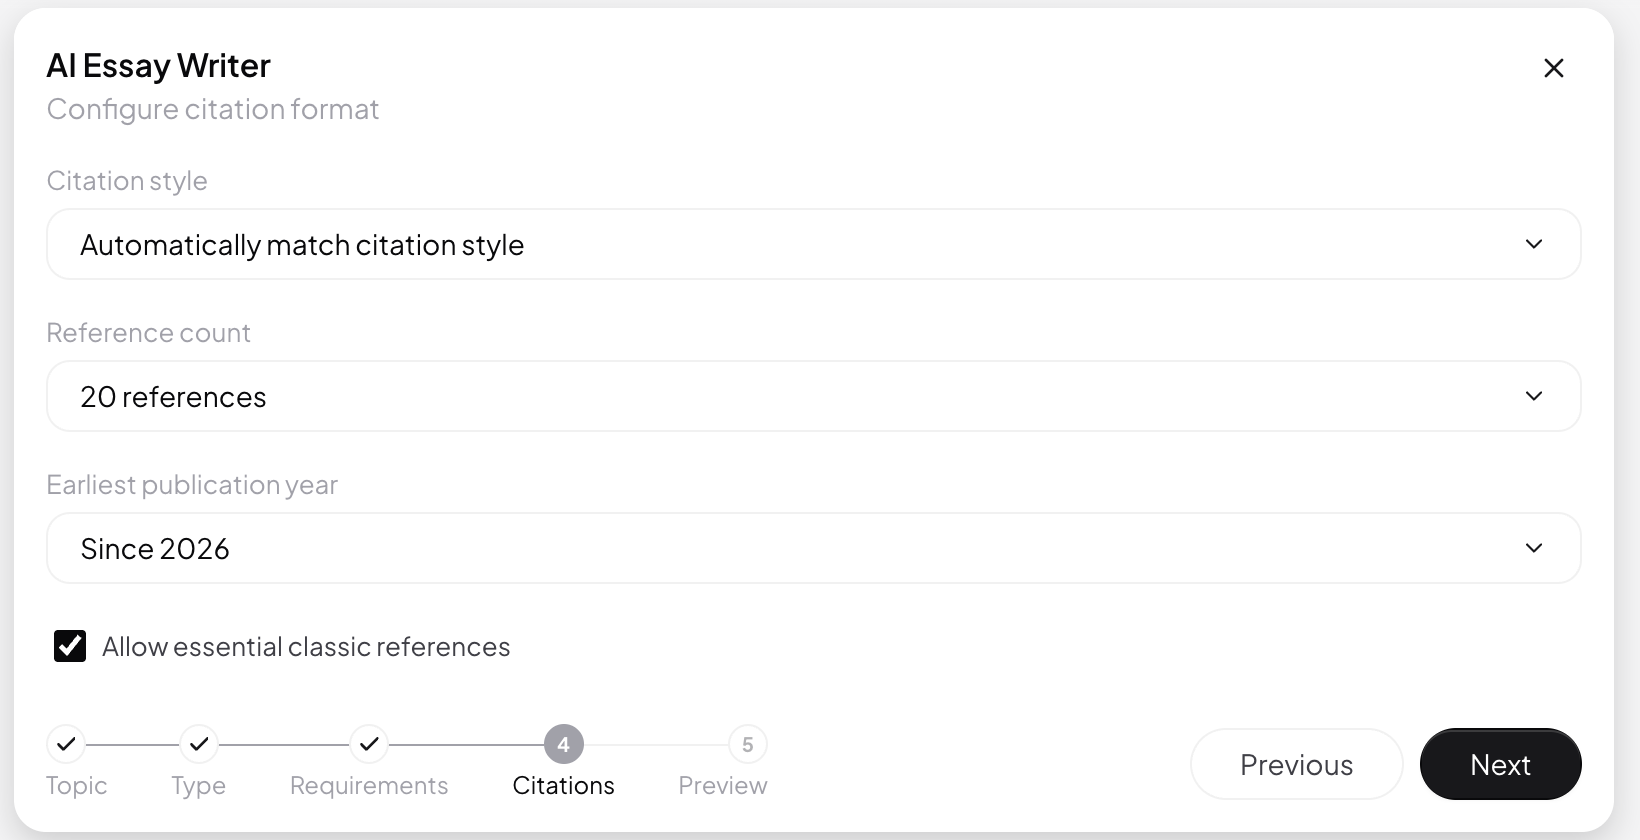
Configure the following:
- Citation Style: Let Essay Writer match the assignment instructions automatically, or choose APA, Harvard, MLA, Chicago, Vancouver, GB/T 7714, ACS, IEEE, or Oxford;
- Number of References: Select a preset number or enter a custom value;
- Publication Year: Choose the earliest publication year for eligible sources;
- Allow Essential Classic Sources: Enable this option to include highly relevant foundational works published before the selected year.
If your instructor specifies a range, enter a custom value such as 15–30. Click Continue when the settings are complete.
Step 5: Review the Settings and Select the Final Files
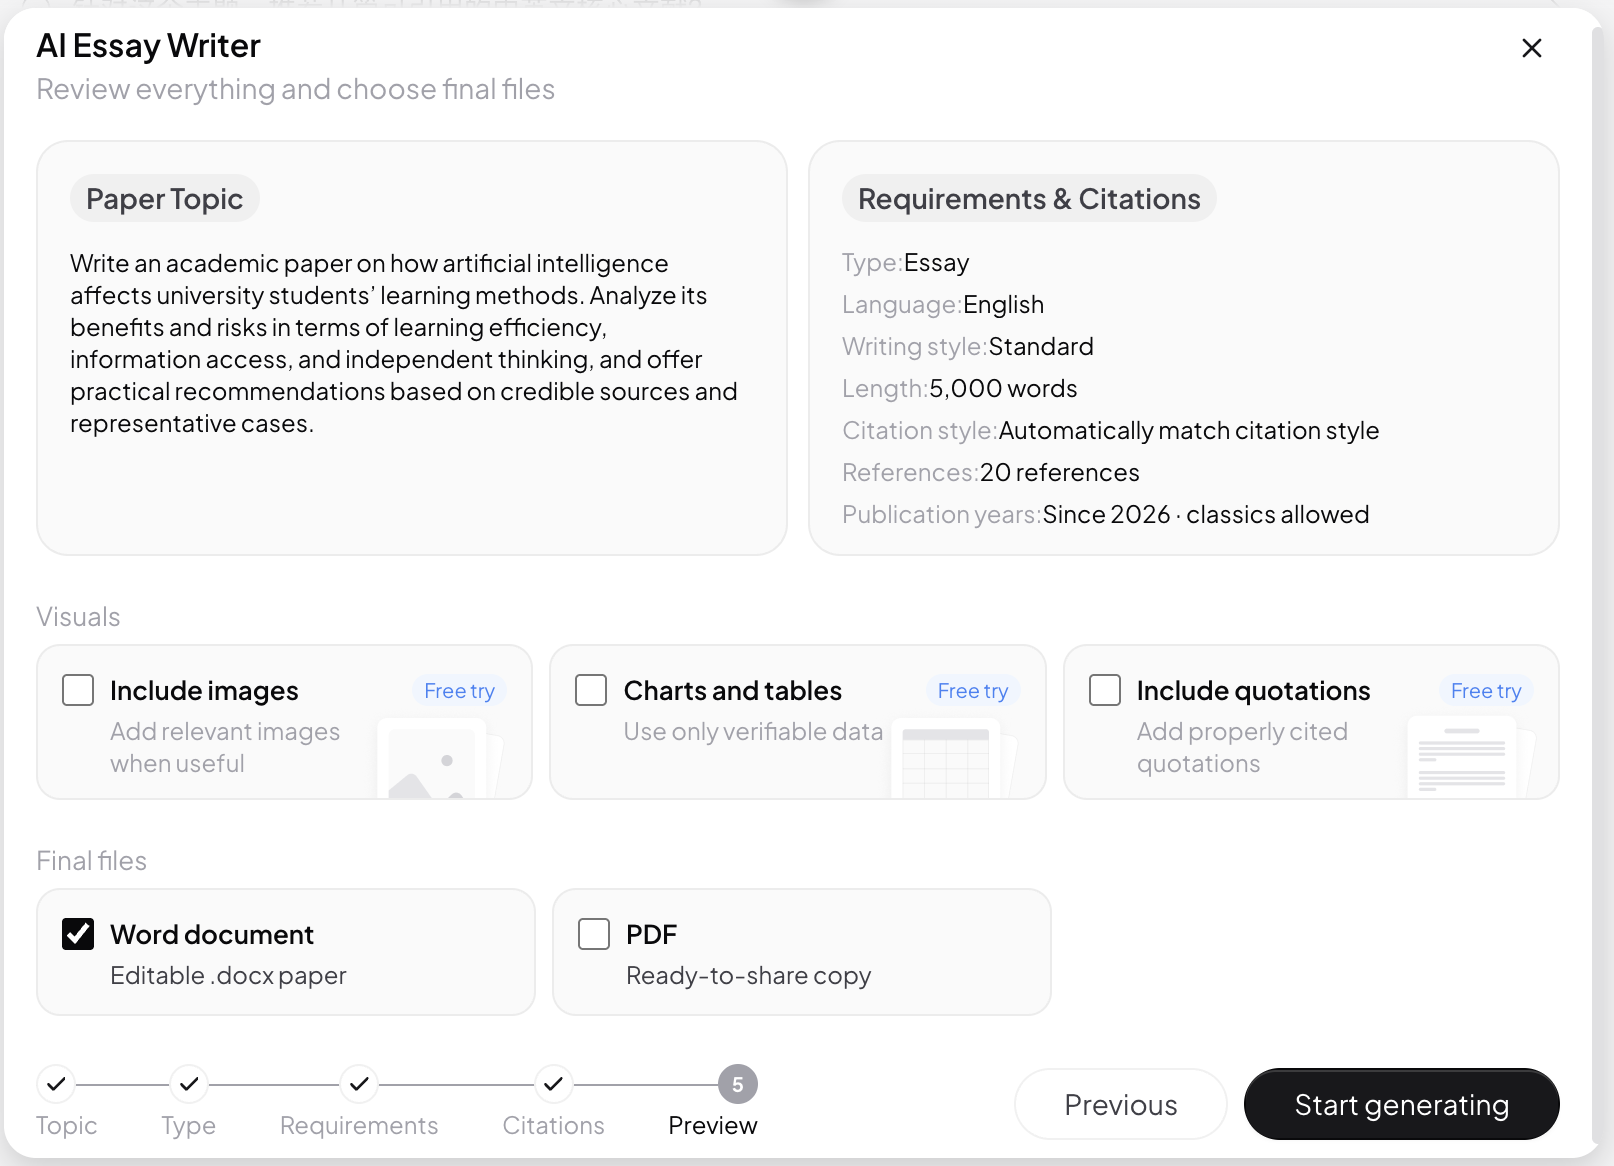
On the review screen, confirm the following:
- The paper topic, attachments, and paper type;
- The writing language, writing style, and target word count;
- The citation style, number of references, and publication date range.
You can also choose whether to include:
- Images;
- Charts and tables;
- Quotations.
These elements are not added by default. Only the options you select will be included in the generation requirements, subject to their availability on the page.
Finally, choose one or both output formats:
- Word document;
- PDF.
Keep at least one format selected, then click Generate Essay.
What Can You Do After Generation?
The task card shows four stages:
- Analyzing requirements;
- Finding and verifying sources;
- Drafting and refining the paper;
- Formatting and checking the files.
When generation is complete, you can download the selected files. To make further changes, select Edit to reopen the setup or choose Add Requirements to provide additional revision instructions.